Aethos

The Defects Encyclopaedia · 19 entries

What went wrong,
and why.

Paint fails in a small number of recognisable ways, and nearly all of them are telling you something about the surface underneath. Find yours, learn the cause, and see honestly whether it is a weekend job or a phone call.

Photographs are of real failures. If yours does not match, send us a picture and we will tell you what we think it is.

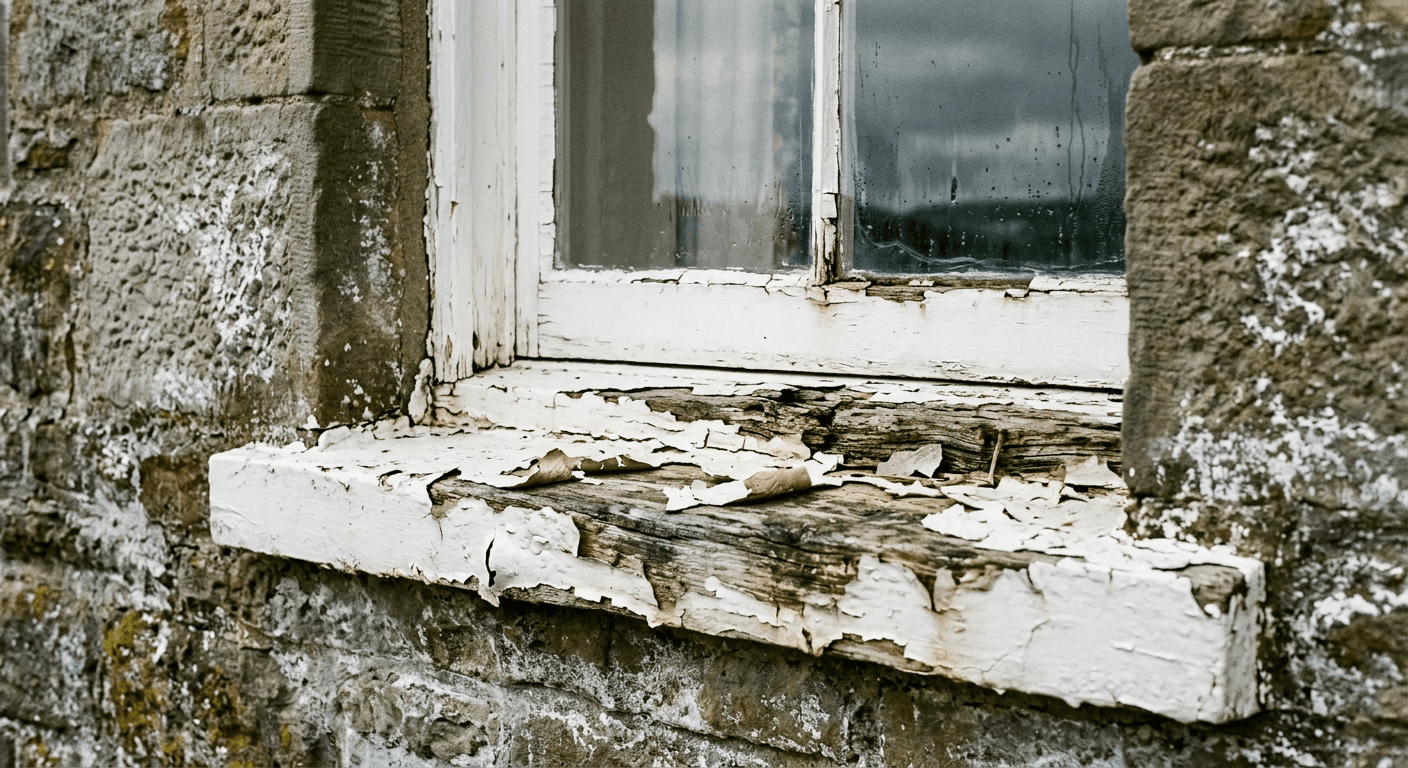
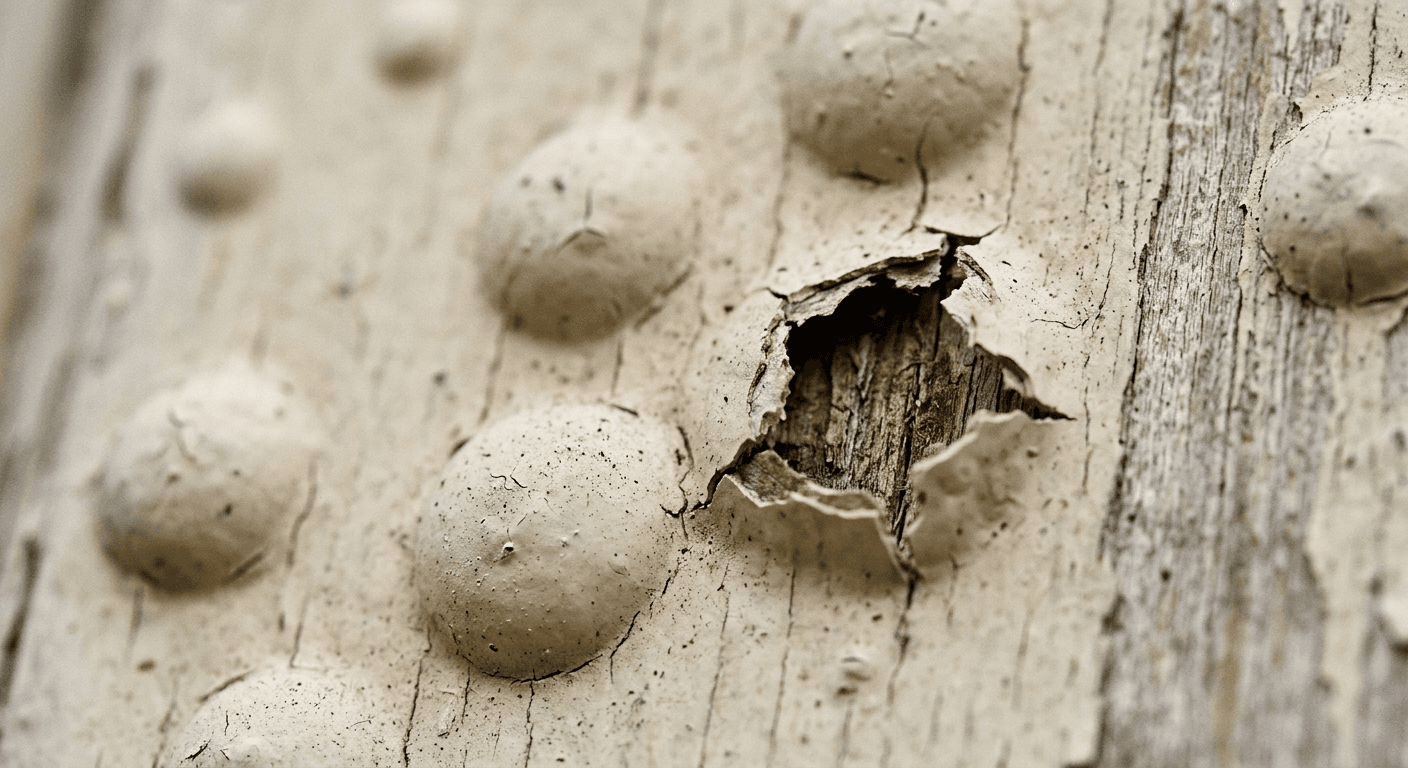
Close up of paint blistering and flaking on an old painted window sill in low light
A sill that has been telling its owner about a leaking gutter for three winters.East Neuk, spring

The entries

19 ways
paint goes wrong.

Blistering: Raised domes or bubbles in the paint film, from pinhead to palm sized
Inside and outDepends on the cause

BlisteringAlso called bubbling

Raised domes or bubbles in the paint film, from pinhead to palm sized. Cut one open and it is either dry underneath, which means solvent or heat, or damp, which means moisture.

Why it happens

  • Painting timber or plaster that still holds moisture
  • Painting in hot sun so the surface skins before the solvent has left
  • Water getting behind the film through a failed joint, cracked putty or open end grain
  • Oil paint over a damp or contaminated undercoat

How it is fixed

  1. 1Scrape back every blister to a firm edge and a little beyond
  2. 2Find and cure the moisture route before anything else, or it will return
  3. 3Let the substrate dry fully, prime the bare patches, fill the edges flush, sand, repaint

Prevent it. Paint dry timber in the shade, seal end grain and joints, and never paint a wall with a damp reading over the manufacturer’s limit.

How to test it

  • Photograph the blister and note rain, heating and exposure patterns. Do not cut unknown older coatings to diagnose them. Once the material is confirmed safe, a competent inspection can distinguish possible moisture and application faults.
  • A timber reading around or above 18% warrants comparison with the maker’s limit and further investigation. It cannot prove how wet the wood was when it was painted.

Depends on the cause. Small dry blisters on interior trim are a weekend job. Exterior blistering that comes back after one repair means water is getting in somewhere you have not found, and that is worth a survey.

Ask us to take a look

Often confused with flaking and peeling and efflorescence.
Flaking and peeling: Paint lifting in brittle flakes or peeling in soft sheets, often revealing a chalky, powdery or glossy layer below
Inside and outDepends on the cause

Flaking and peeling

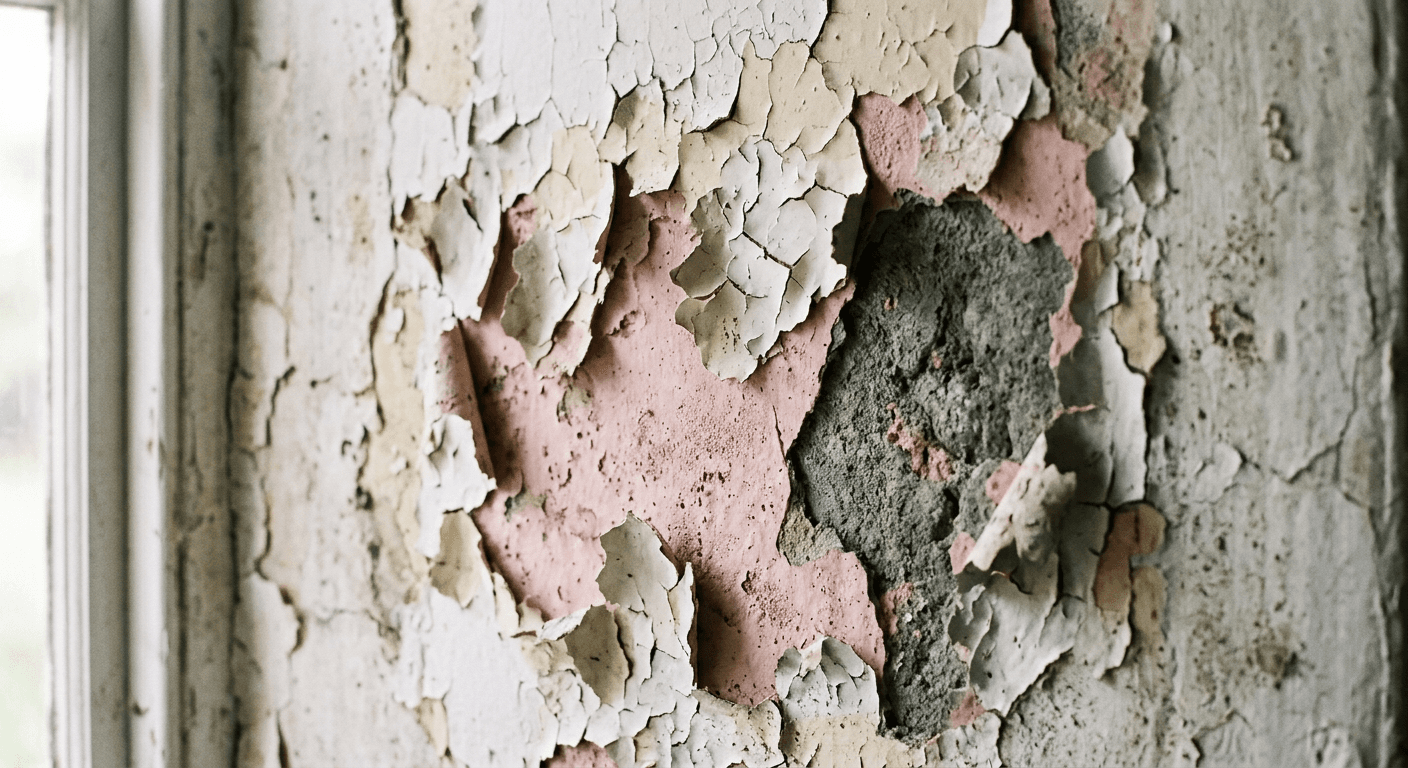
Paint lifting in brittle flakes or peeling in soft sheets, often revealing a chalky, powdery or glossy layer below. On old walls you may see pink or ochre distemper underneath.

Why it happens

  • Paint applied over distemper, chalk or dust that never bonded
  • Vinyl emulsion on lime plaster, trapping moisture until it lets go
  • Water based paint over unsanded gloss
  • Too many layers of old paint losing grip with age and movement
  • Damp behind the surface

How it is fixed

  1. 1Scrape and, where safe, sand back to a sound edge. Feather the edges so the repair does not show
  2. 2Wash off distemper completely with warm water until the wall stops chalking
  3. 3Stabilise powdery surfaces with a stabilising solution, or seal old lime with a breathable primer
  4. 4Prime bare areas with the correct primer, fill, sand, then a full system

Prevent it. Match the paint to the substrate. Breathable on lime, adhesion primed on gloss, mist coat on new plaster.

How to test it

  • Inspect loose edges without disturbing them. A controlled adhesion trial may help on a confirmed safe coating, but one patch cannot establish the condition of the whole surface. Do not cut unknown older paint.
  • A powdery or water sensitive layer can have several causes, including distemper or a weak coating. Do not identify it solely by transfer onto a cloth.

Depends on the cause. Flaking on a modern plasterboard wall is usually a straightforward fix. Flaking on a pre 1919 wall often means the coating is wrong for the wall and the whole room needs the right system. Have it looked at before you repaint the same way.

Ask us to take a look

Often confused with blistering and chalking.

OutsideFix it yourself

Chalking

A fine white powder that comes off on your hand when you rub the wall or woodwork. Colours look faded and washed out. Often streaks below onto brick or stone.

Why it happens

  • Ultraviolet breaking down the binder in old masonry or gloss paint, normal after many years
  • Cheap paint with too little binder
  • Paint spread too thin, or over thinned
  • Interior paint used outside

How it is fixed

  1. 1Wash down with a stiff brush and clean water, or a fungicidal wash if there is green as well, and rinse thoroughly
  2. 2Rub a test patch when dry. If it still chalks, apply a stabilising primer
  3. 3Recoat with a quality exterior paint at the proper spread rate

Prevent it. Use exterior grade paint at the coverage on the tin, not stretched. Recoat before it chalks badly rather than after.

How to test it

  • Rub the surface with a dark cloth or the back of your hand. A white or coloured powder transferring across is chalking.
  • After washing and drying, repeat the rub on a test patch. Any powder still there needs a stabilising primer before the next coat.

Fix it yourself. Washing and recoating a chalky wall is well within reach of a careful homeowner with a ladder they trust.

Often confused with fading and colour change.

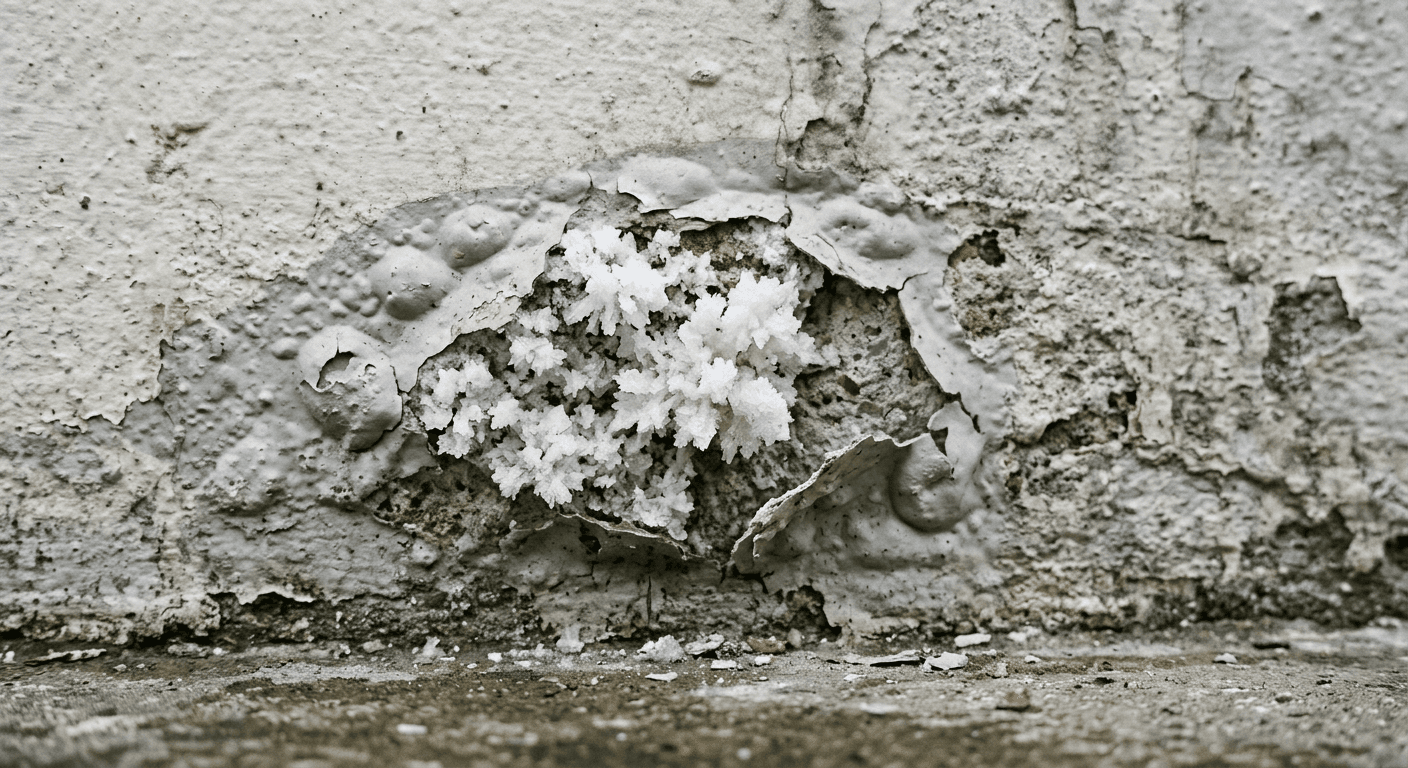
Efflorescence: White, fluffy or crystalline deposits pushing through paint on masonry or plaster, usually low on walls or around chimneys
Inside and outWorth a call first

EfflorescenceAlso called salt bloom

White, fluffy or crystalline deposits pushing through paint on masonry or plaster, usually low on walls or around chimneys. The paint around it bubbles and powders.

Why it happens

  • Moisture moving through masonry and carrying soluble salts to the surface, where it evaporates and leaves the salt behind
  • New render or plaster still drying out
  • Rising or penetrating damp, a leaking gutter, a bridged damp course, a blocked chimney
  • Sea air on coastal houses adds its own salt load

How it is fixed

  1. 1Stop the water. Until the source is fixed, no paint will hold
  2. 2Brush off the salt dry. Do not wash it, that dissolves it back in
  3. 3Allow to dry for weeks, brushing again as salts appear
  4. 4Use a breathable coating such as limewash, clay or mineral paint so salts can keep migrating without popping the film

Prevent it. Keep gutters, downpipes and ground levels right. Never seal a damp wall with a plastic paint.

How to test it

  • Photograph the deposit and check for a pattern after rain or drying. Do not touch or taste unknown deposits. Appearance alone cannot confirm the substance.
  • Electrical readings on masonry are affected by salts and material. A high reading near the floor does not diagnose rising damp. Investigate rainwater goods, ground levels, ventilation and the wall construction.

Worth a call first. The paintwork is the symptom. Salt bloom means water is moving through the wall and the cause is often outside the room. Get it diagnosed before you spend on decoration.

Ask us to take a look

Often confused with blistering and mould and mildew.

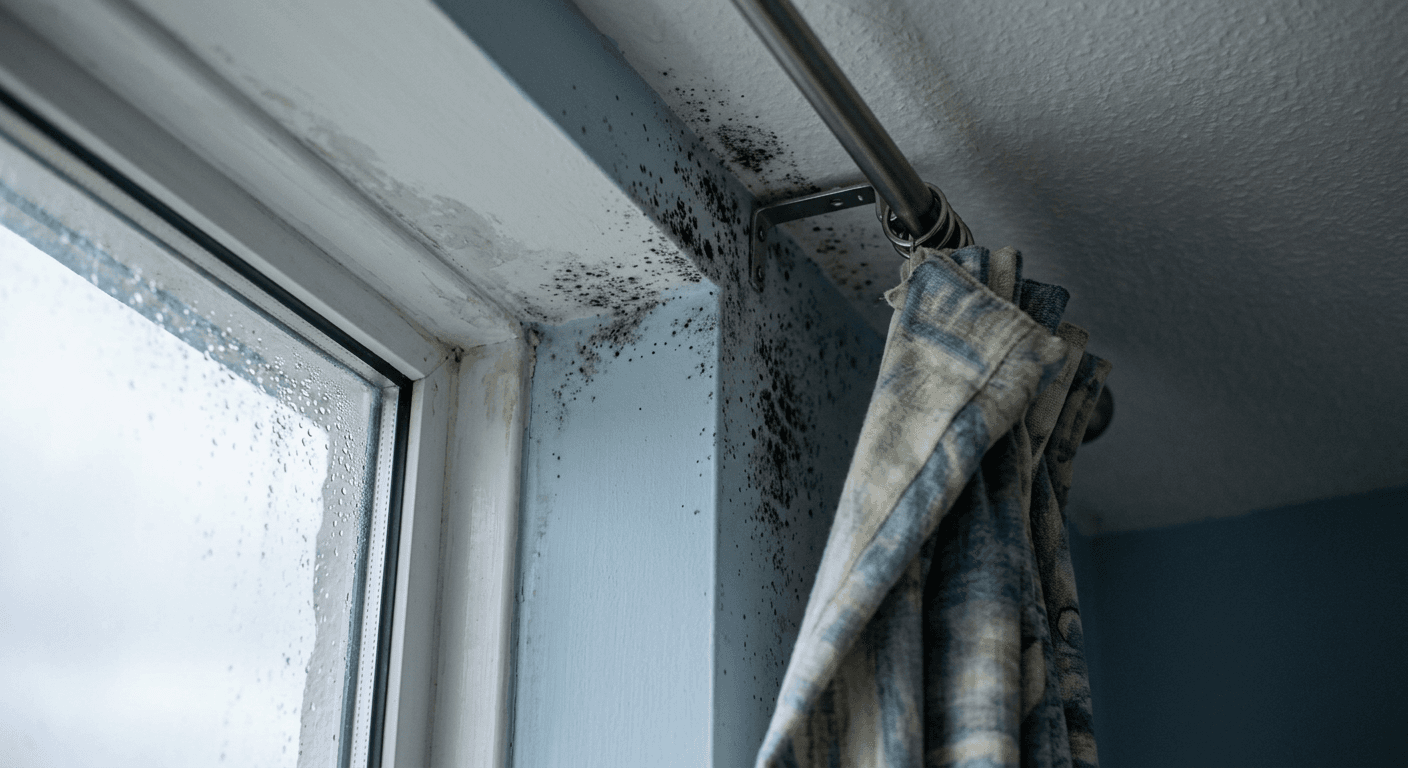
Mould and mildew: Black, green or grey speckling that grows in corners, behind furniture, on cold external walls and around windows
Inside and outFix it yourself

Mould and mildew

Black, green or grey speckling that grows in corners, behind furniture, on cold external walls and around windows. Wipes off to show a stain, then comes back.

Why it happens

  • Condensation on cold surfaces in rooms with too little ventilation and too much moisture from cooking, showering, drying clothes
  • Furniture hard against an external wall
  • A cold bridge such as a solid lintel or uninsulated corner
  • Penetrating damp on external walls

How it is fixed

  1. 1Treat with a fungicidal wash, leave it to work, wipe off. Do not just paint over it
  2. 2Increase ventilation: extractor fans that run, trickle vents, windows opened after showers, lids on pans
  3. 3Pull furniture off external walls by a hand’s width
  4. 4Paint with an anti mould or anti condensation paint as a last step, not the first

Prevent it. Warm air, moving air and dry air. Heating, ventilation and not drying washing on radiators without a window open.

How to test it

  • Do not use bleach as an identification test or mix cleaning chemicals. Recurrent growth needs its moisture source investigated, not just a stain blocker.
  • Record where and when growth appears, together with leaks, condensation and ventilation. A foil or plastic sheet test cannot reliably establish the cause. Seek appropriate assessment for extensive or recurring mould.

Fix it yourself. Cleaning and improving airflow is entirely doable. Mould that returns within weeks after that, especially in one patch, may be a damp problem and worth a look.

Often confused with efflorescence.

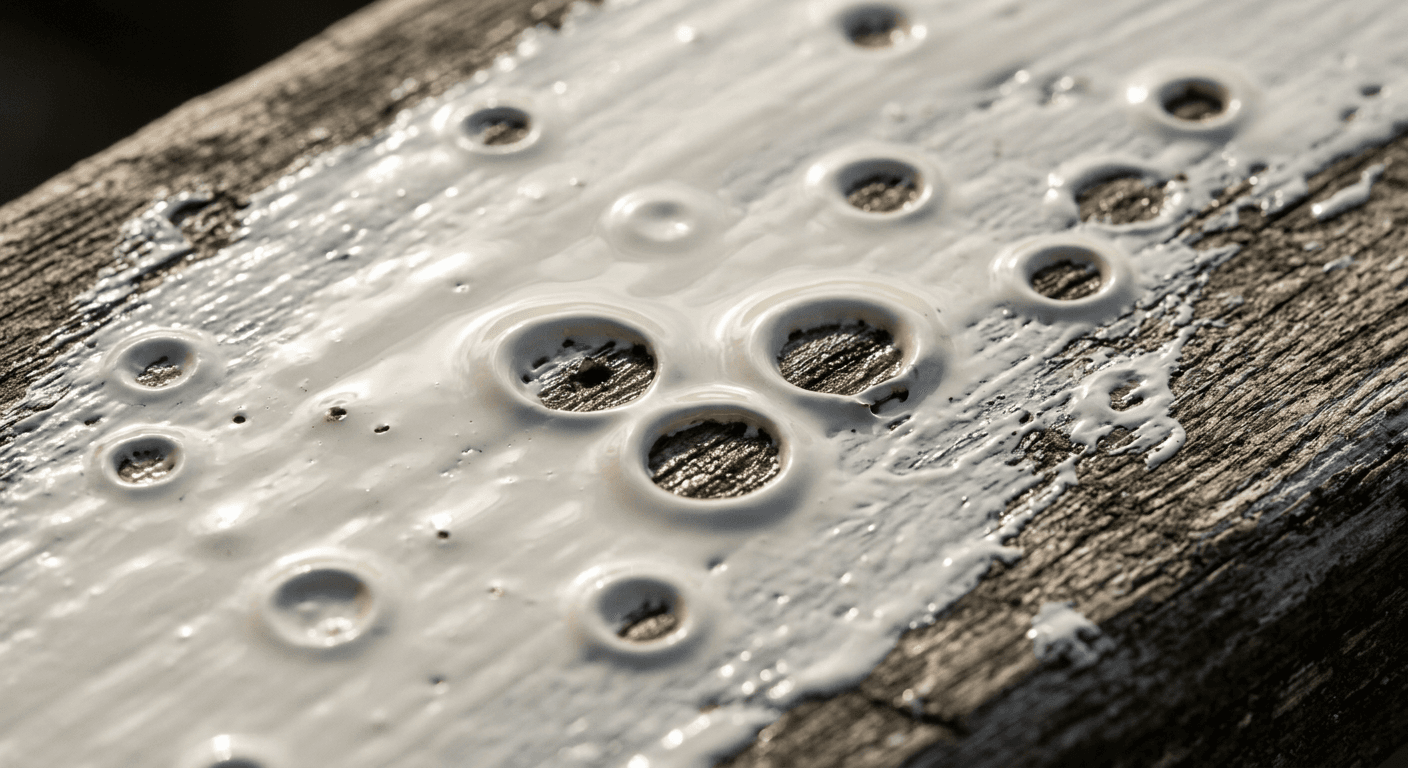
Cissing: Wet paint pulls away from spots as it goes on, leaving small round craters or bare islands like water on a waxed car
Inside and outFix it yourself

CissingAlso called fish eyes, crawling

Wet paint pulls away from spots as it goes on, leaving small round craters or bare islands like water on a waxed car.

Why it happens

  • Grease, silicone, polish or wax on the surface
  • Fingerprints and hand cream on doors and skirtings
  • Silicone sealant residue or spray polish drifting onto woodwork
  • A very glossy surface that has not been abraded

How it is fixed

  1. 1Let the paint dry, then sand it off
  2. 2Degrease thoroughly with a sugar soap or solvent wipe, rinse, dry
  3. 3Abrade to give a key and, on stubborn cases, use an adhesion primer
  4. 4Repaint

Prevent it. Wash and sand every surface before painting, and keep furniture polish out of the room for a day.

How to test it

  • Wipe a clean white cloth with methylated spirits across the area. A greasy or waxy residue on the cloth confirms contamination.
  • Flick a few drops of water on the surface. If they bead up tightly instead of spreading, the surface needs degreasing and keying.

Fix it yourself. Frustrating but simple. It is nearly always contamination.

Often confused with poor adhesion and peeling from gloss.

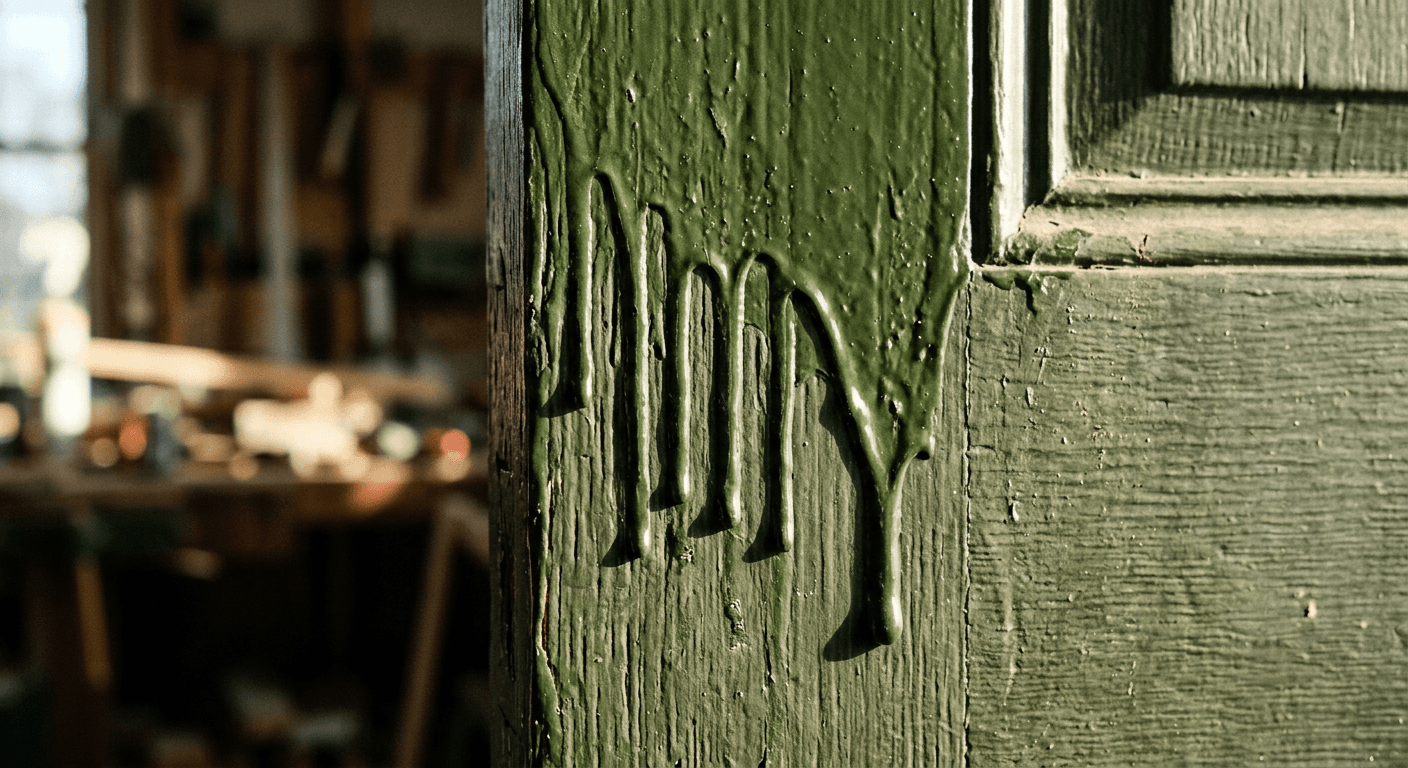
Runs, sags and curtains: Dried drips with fat rounded edges, or a wave of paint that has slid down a door panel or moulding
Inside and outFix it yourself

Runs, sags and curtains

Dried drips with fat rounded edges, or a wave of paint that has slid down a door panel or moulding.

Why it happens

  • Too much paint on the brush or roller
  • Paint over thinned
  • Not brushing out or laying off properly, especially in mouldings and corners
  • Cold conditions slowing the drying so paint keeps moving

How it is fixed

  1. 1Leave it to harden completely, a day or more
  2. 2Slice off the worst with a sharp blade held flat, then sand smooth
  3. 3Spot undercoat if you have gone through, then a light full coat

Prevent it. Less paint, more often. Brush from the moulding outward and check your work in a raking light before you move on.

How to test it

  • Press a fingernail into the thickest part of a run. If it dents, it is not hard enough to cut back yet and needs longer.

Fix it yourself. A cosmetic fix any patient person can make.

Often confused with brush marks and ropiness.

Inside and outFix it yourself

Brush marks and ropiness

Visible ridges and lines of paint that did not flow out, often in the direction of the last stroke. Ropey paint has a thick corded texture.

Why it happens

  • Paint too thick or drying too fast in a warm room
  • Overworking the paint after it has started to set
  • A worn or cheap brush
  • Water based trim paint applied like oil, with too much going back over

How it is fixed

  1. 1Sand smooth once fully dry
  2. 2Thin the paint slightly if the tin allows, or add a flow conditioner for water based trim paints
  3. 3Apply in thinner coats with a good quality brush, lay off once and leave it

Prevent it. A good brush, the right thinning, and the discipline to stop touching it.

How to test it

  • Hold a torch flat against the surface in a darkened room. A raking light shows every ridge, so you know how much sanding is needed.

Fix it yourself. Mostly a technique problem. Our workshops spend an hour on laying off for exactly this reason.

Often confused with runs, sags and curtains.

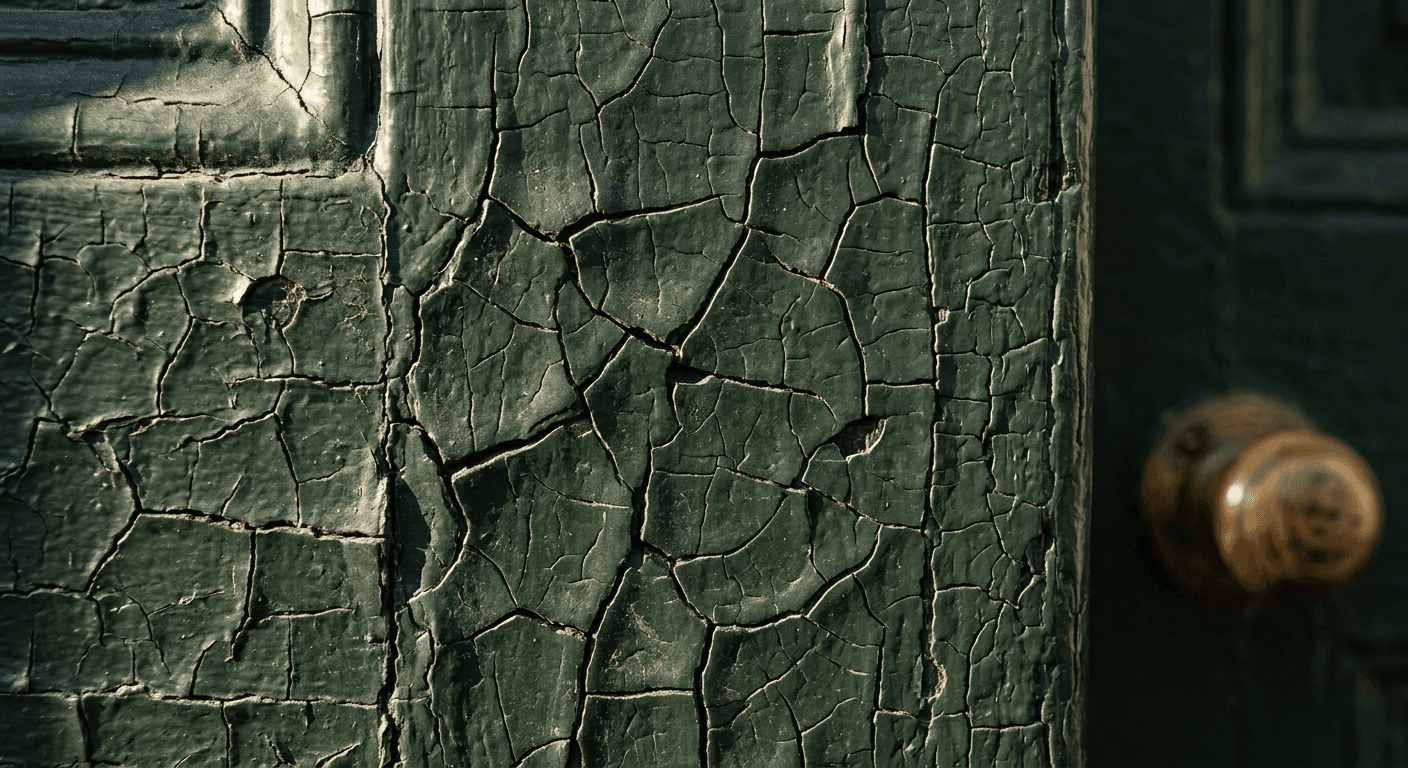
Crazing and alligatoring: A network of fine cracks in the paint film
Inside and outDepends on the cause

Crazing and alligatoring

A network of fine cracks in the paint film. Alligatoring is the same thing gone deep, with paint split into islands like reptile skin, usually on very old oil paint.

Why it happens

  • A hard top coat over a soft undercoat still curing, so the layers move at different rates
  • Many years of oil paint growing brittle
  • Paint applied too thick
  • Limewash applied too heavy or on a dry wall

How it is fixed

  1. 1For surface crazing, sand smooth and recoat with a compatible paint
  2. 2For alligatoring, the old paint has failed as a system and needs stripping back, by heat, chemical or careful scraping, then primed from bare
  3. 3For limewash, brush off the loose and apply thinner coats on a dampened wall

Prevent it. Let each coat cure properly and keep the whole system in one family, water on water or oil on oil.

How to test it

  • Use a magnifier to check whether cracks stop in the top coat or go down to bare wood. Surface crazing can be sanded, deep cracks mean the system has failed.
  • Before sanding or stripping older coatings, assess lead and other material risks. House age and a single home test cannot rule out hazardous layers.

Depends on the cause. Light crazing yes. Alligatored Victorian paint may contain lead and stripping it needs care and a lead test first.

Ask us to take a look

Often confused with flaking and peeling.

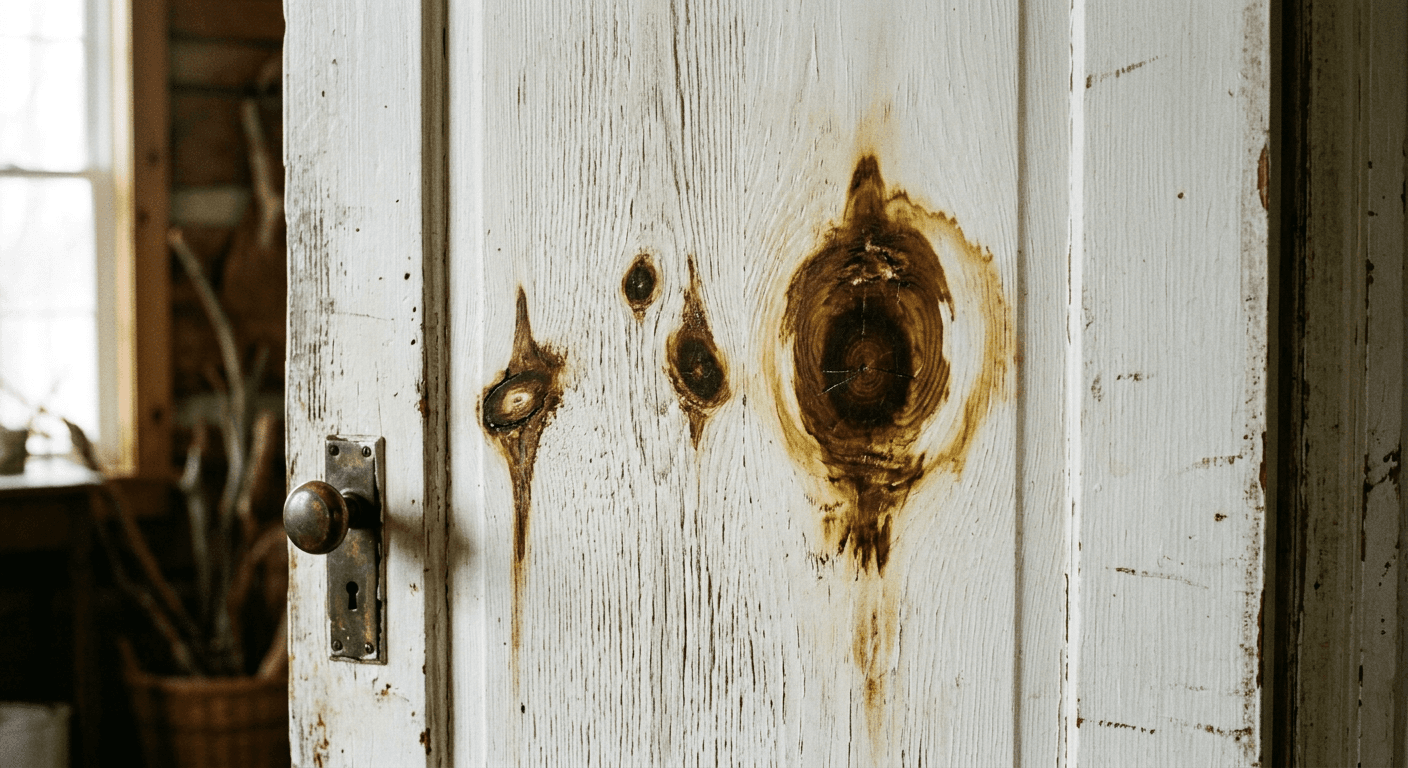
Tannin and knot bleed: Brown or yellow stains ghosting through white or pale paint on pine, oak and cedar, often as a halo around a knot
Inside and outFix it yourself

Tannin and knot bleed

Brown or yellow stains ghosting through white or pale paint on pine, oak and cedar, often as a halo around a knot.

Why it happens

  • Natural resins and tannins in the timber dissolved by the water in water based paints and drawn to the surface
  • Knots warmed by sun or radiators weeping resin
  • No knotting solution or stain blocking primer used

How it is fixed

  1. 1Sand the stained area lightly
  2. 2Apply shellac based knotting or a shellac stain blocker over knots and the whole face for oak and cedar, two coats
  3. 3Undercoat and repaint

Prevent it. Knot and prime every piece of new softwood before the first coat. Every one.

How to test it

  • Check the timber species. Pine knots, oak and cedar are the usual culprits, and a halo shape around a knot confirms resin rather than water staining.

Fix it yourself. Simple once you know the product. Shellac dries in minutes.

Often confused with water, nicotine and soot stains.

InsideFix it yourself

Water, nicotine and soot stains

Yellow, brown or grey marks that bleed back through fresh emulsion within days, often on ceilings or above radiators and fireplaces.

Why it happens

  • An old or current leak leaving mineral deposits in the plaster
  • Decades of nicotine or cooking fumes bonded into the paint
  • Soot from an open fire or candles
  • Marker pen, crayon, rust from a fixing

How it is fixed

  1. 1Cure the leak and let the plaster dry fully
  2. 2Wash with sugar soap and rinse
  3. 3Two coats of stain blocking primer, shellac based for the stubborn ones
  4. 4Repaint

Prevent it. Seal before you paint whenever a surface has a history.

How to test it

  • Feel the stained area and take a moisture reading. If it is damp or the reading is higher than the surrounding wall, the leak is still active and no stain blocker will hold yet.

Fix it yourself. Entirely doable. The only mistake is skipping the blocker to save an hour.

Often confused with tannin and knot bleed.

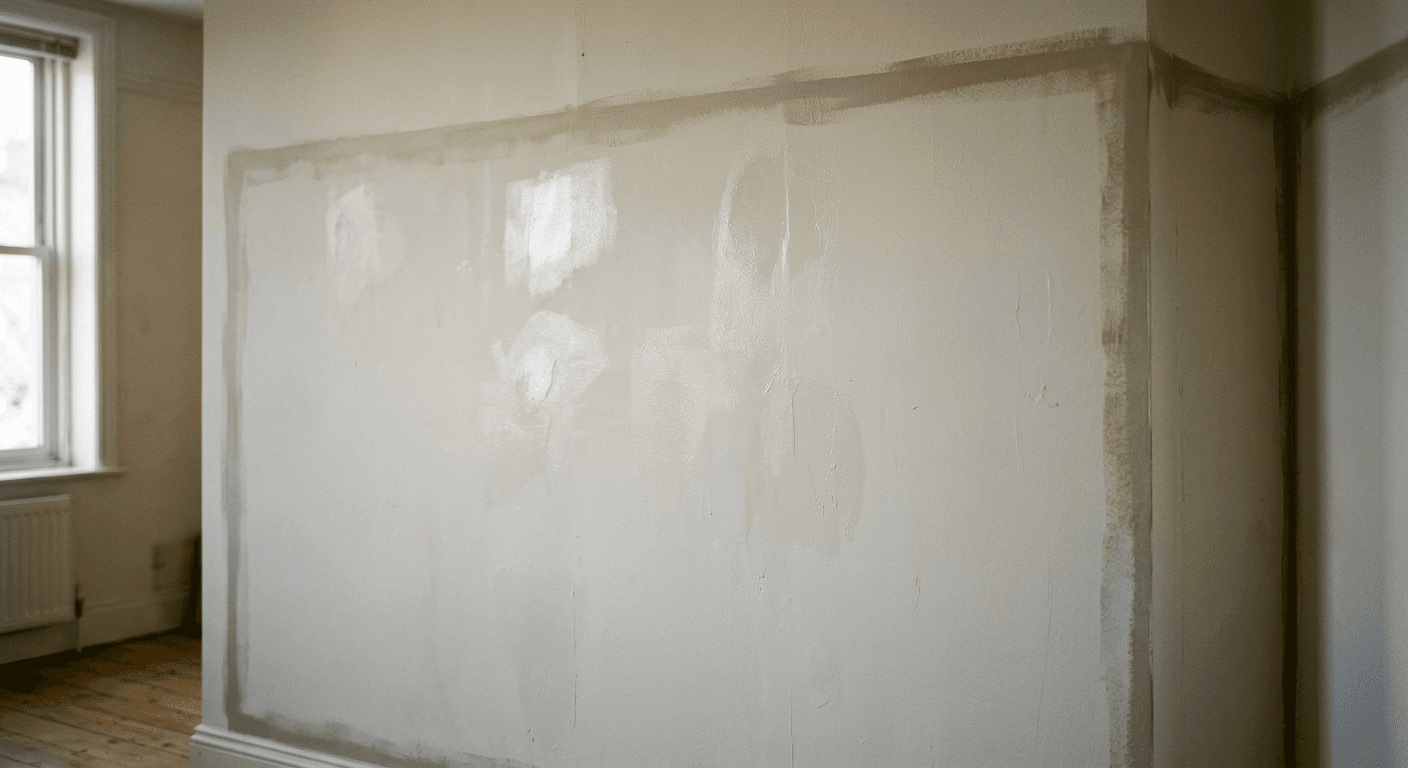
Flashing and picture framing: Patches of wall that look shinier or duller than the rest, or a frame of different texture around the edges of a wall where brush meets roller
InsideFix it yourself

Flashing and picture framing

Patches of wall that look shinier or duller than the rest, or a frame of different texture around the edges of a wall where brush meets roller. Only visible from certain angles or in low light.

Why it happens

  • Filler or bare patches not primed, so they absorb paint differently
  • Cutting in with a brush and rolling the middle at different times or with different loads
  • Touching up a dry wall with a brush
  • Too few coats over a porous surface
  • Cheap paint with poor sheen uniformity

How it is fixed

  1. 1Spot prime every filled area with thinned emulsion and let it dry
  2. 2Apply a full further coat to the whole wall, corner to corner, keeping a wet edge
  3. 3Cut in and roll each wall in one continuous pass
  4. 4For touching up, use a small roller with the same sleeve, not a brush

Prevent it. Prime your fills, keep a wet edge, finish each wall in one go.

How to test it

  • Look along the wall from a low angle with a light behind you. Patches that shine differently are where filler or bare plaster soaked up the paint unevenly.

Fix it yourself. Common and fixable. Usually a full coat sorts it.

Often confused with lap marks and roller stipple.

InsideFix it yourself

Lap marks and roller stipple

Bands of heavier colour where one roller pass overlapped a half dry one, or an uneven orange peel texture across a wall.

Why it happens

  • Painting in strips and letting each dry before the next
  • Working in a warm room or draught where the paint sets fast
  • Wrong roller pile for the paint, or a cheap sleeve
  • Pressing hard on a roller running out of paint

How it is fixed

  1. 1Let it dry, sand any ridges
  2. 2Recoat the whole wall, working from the light source in overlapping W passes and laying off in one direction

Prevent it. A wet edge, a well loaded roller and the right sleeve.

How to test it

  • View the wall with light coming across it from a window. Banding that runs in roller width stripes confirms lap marks rather than uneven coverage.

Fix it yourself. Technique. Our Kit Room explains sleeve choice and the workshop covers the method.

Often confused with flashing and picture framing.

Inside and outFix it yourself

Orange peel

A dimpled texture like the skin of an orange on what should be smooth trim paint.

Why it happens

  • Paint too thick for the brush or roller to level
  • Spraying with wrong pressure or too far from the surface
  • Foam rollers on gloss or satin
  • Cold conditions

How it is fixed

  1. 1Sand flat once dry, wet sanding works well on gloss
  2. 2Thin the paint as the tin allows and apply with a quality brush or a short pile microfibre mini roller then lay off with a brush

Prevent it. Right tool, right consistency, lay off every pass.

How to test it

  • Run your palm lightly across the surface with your eyes shut. You will feel the dimpling even where light hides it, which tells you how far to sand.

Fix it yourself. Sand and try again with a better brush.

Often confused with brush marks and ropiness.

Inside and outFix it yourself

Poor adhesion and peeling from gloss

New paint that peels off in a sheet when you catch it with a fingernail or a piece of tape, often showing shiny old paint underneath.

Why it happens

  • New paint over old gloss or varnish without sanding and an adhesion primer
  • Painting over grease, dust or a chalky surface
  • Water based paint over oil that was not keyed
  • Painting over a powdery mist coat that was over thinned

How it is fixed

  1. 1Strip back all the peeling paint
  2. 2Degrease, sand thoroughly, dust off
  3. 3Adhesion primer, then the finish system

Prevent it. Every glossy surface gets washed, sanded and primed. No exceptions.

How to test it

  • A solvent response is only a clue, not a reliable identification of the binder. Check coating records and ask the proposed system’s manufacturer for compatibility guidance.
  • Only carry out a small adhesion trial once the materials are confirmed safe, following an appropriate method. Do not cut or abrade suspected lead or asbestos containing surfaces.

Fix it yourself. Frustrating to redo but a straightforward fix.

Often confused with cissing and flaking and peeling.

Inside and outFix it yourself

Fading and colour change

Colour that has drifted, usually paler or yellower, unevenly where sun falls. Outside, south and west faces lose colour first.

Why it happens

  • Ultraviolet breaking down pigments, especially reds, deep blues and organics
  • Oil based whites yellowing in the dark
  • Cheap paints using fugitive pigments
  • Chalking taking the colour with it

How it is fixed

  1. 1Wash down, stabilise if chalky, and recoat
  2. 2Choose a paint with lightfast mineral pigments for exterior colour

Prevent it. Quality exterior paint, and accept that strong colours outside will need recoating sooner than pale ones.

How to test it

  • Compare sunlit and shaded areas or a patch behind a freely movable picture. Do not remove electrical fittings for a colour comparison. Surface powder and colour change are separate clues, not a conclusive diagnosis.

Fix it yourself. A recoat.

Often confused with chalking.

Inside and outFix it yourself

Wrinkling

The paint surface has puckered into fine ridges like the skin on hot milk.

Why it happens

  • Oil paint applied far too thick so the surface dries and the underneath keeps moving
  • Painting in direct hot sun or onto a hot surface
  • Recoating oil paint before the previous coat has cured

How it is fixed

  1. 1Let it harden completely, a week if necessary
  2. 2Sand or scrape flat
  3. 3Repaint in thin coats

Prevent it. Thin coats, cool conditions, patience between coats.

How to test it

  • Press a fingernail into the wrinkled film. Soft paint underneath means the body of the coat has not cured, so leave it longer before sanding.

Fix it yourself. Sand and repaint thinner.

Often confused with runs, sags and curtains.

Inside and outFix it yourself

Bittiness and nibs

Small specks and bumps in the dried film that you can feel with your palm.

Why it happens

  • Dust in the room or on the surface
  • Skin from an old tin of paint broken into the paint
  • Bristles shedding from a poor brush
  • Sanding dust not wiped off

How it is fixed

  1. 1Let dry, sand lightly with fine paper, wipe with a barely damp cloth
  2. 2Strain old paint through a paint strainer or tights
  3. 3Recoat in a clean room

Prevent it. Dust off, vacuum the floor, tack cloth the trim, strain old paint.

How to test it

  • Run the flat of your palm across the dried surface. Every nib you feel is dust or skin, and you can count them to judge whether a light sand will do.

Fix it yourself. Cleanliness.

InsideFix it yourself

Cracks at joints and corners

Hairline cracks where skirting meets wall, along the ceiling line, at the corners of the room, or where old plaster meets new.

Why it happens

  • Normal seasonal movement between timber and plaster
  • Filler used where flexible caulk should have been
  • A new building drying out
  • Occasionally structural movement, which shows as stepped or widening cracks

How it is fixed

  1. 1Rake out and fill with decorators caulk at joints between different materials, then paint over
  2. 2For plaster cracks, open slightly, fill with a flexible filler, tape if recurring, sand and prime

Prevent it. Caulk the joints that move, fill the ones that do not.

How to test it

  • Mark both ends of a crack with a pencil line and the date. If it has grown past the marks after a few weeks, call a surveyor. If it opens and closes with the seasons, it is normal movement.

Fix it yourself. Hairline cracks that come back every winter are just the house breathing. A crack that widens month by month, or that runs diagonally from a window corner, is one to have looked at by a surveyor, not a decorator.

Showing 19 of 19.

Still not sure

Send a photo.
We will tell you straight.

Most defects can be identified from a decent photograph taken in daylight, close up and then from across the room. We will tell you what we think it is and whether it needs us, a builder, or an afternoon of your own time.

One defect and its cause explained in every letter.

A painting weather window, one colour, one repair tip and one photograph from a live job. Every fortnight, nothing else.